Projects & Plans
Build a Set of Shop Sawhorses
Step-by-step guide to building a pair of sturdy shop sawhorses from 2x4 lumber. Includes a full cut list, stackable design tips, and beginner notes.
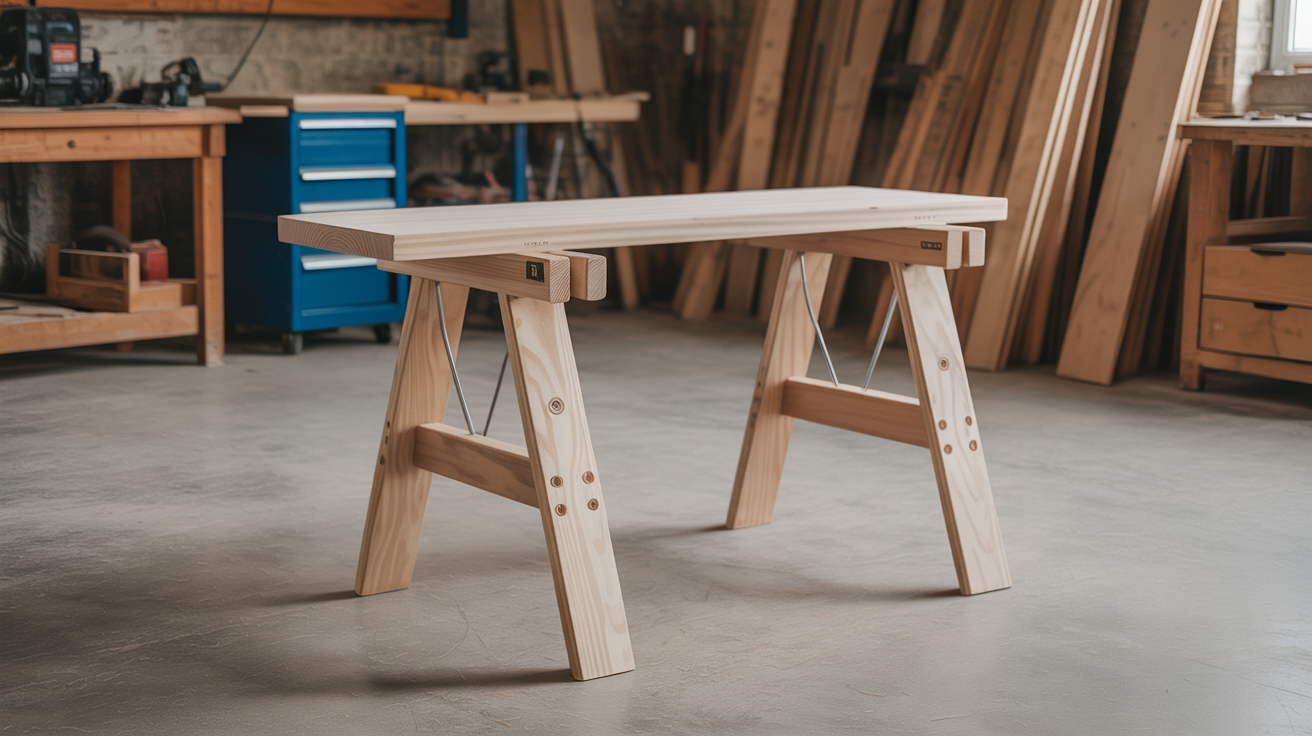
A pair of sawhorses is the most useful thing you can build on your first weekend as a woodworker. Here are plans for a simple, sturdy design that stacks flat for storage and costs roughly $15 in lumber per pair.
Why Build Your Own Sawhorses
Store-bought folding sawhorses work, but they wobble under heavier loads, the legs splay unpredictably, and they tend to rack sideways when you put real pressure on them. A site-built sawhorse from 2x4s solves all three problems. The frame is rigid because the leg panels are glued and screwed, not hinged. The height is whatever you want it. And because you built them, you can repair them.
This design sits at 32 inches tall, which puts most rough-cut lumber at a comfortable working height. Taller builders often prefer 34 inches. The stackable feature means the horses nest inside each other for storage rather than cluttering floor space.
This makes a good early workshop project. If you have not yet tried a first box build, build a simple wooden box as a first project before tackling the sawhorses, since box joinery teaches the same measuring and squaring habits you will use here. Once you have sawhorses, a flat assembly surface is the next logical addition: see how to build a sturdy workbench for a bench design that pairs well with this setup.
What You Will Need
Tools:
- Circular saw or miter saw
- Drill and driver bits
- Tape measure and pencil
- Speed square or combination square
- Clamps (four is enough)
- Safety glasses and hearing protection
Fasteners and hardware:
- 3-inch construction screws (coarse thread, no pre-drilling needed in 2x4)
- Wood glue
Lumber for two sawhorses:
- Six 8-foot 2x4s (standard framing lumber, no need for premium boards)
Total cost for a pair is usually $12 to $18 depending on your region and current lumber prices. There is no need for dimensional lumber without knots; tight-knot construction lumber is fine for sawhorses.
Cut List
All parts are cut from standard 2x4 lumber (actual size 1.5 x 3.5 inches). The measurements below produce sawhorses 32 inches tall. If you want a different height, adjust the leg length accordingly and recalculate the leg-panel stretcher.
| Part | Qty per horse | Length | Notes |
|---|---|---|---|
| Top rail | 1 | 36 in | Rip a 15-degree bevel on each long face (optional but helps stock stay put) |
| Legs | 4 | 34 in | Cut ends at 15 degrees, parallel cuts (both ends lean the same direction) |
| Leg-panel stretcher (lower) | 2 | 15 in | Connects each pair of legs near the bottom |
| Leg-panel stretcher (upper) | 2 | 6 in | Connects each pair of legs near the top, below the rail |
| Gusset block | 2 | 3.5 in | Glued and screwed to the top rail at each end to accept the leg panels |
Per horse: 1 top rail, 4 legs, 2 lower stretchers, 2 upper stretchers, 2 gusset blocks.
For two sawhorses: double every quantity above.
A note on leg angle: 15 degrees is the standard splay for shop sawhorses. It gives a stable footprint without the legs going so wide that the horses tip sideways. If your miter saw goes to 15 degrees, that is all you need. If you are using a circular saw, set a bevel guide to 15 degrees, or mark the angle with a protractor and cut freehand with a sharp pencil line.
Building the Leg Panels
Each sawhorse has two leg panels. A panel is two legs connected by a lower and upper stretcher, forming a wide letter A without the crossbar.
Step 1: Cut the legs. Set your saw to 15 degrees and cut one end of all your leg blanks. Then flip each blank end for end and cut the other end at the same bevel angle so the two cuts are parallel. This is what makes the legs splay outward rather than kick one direction.
Step 2: Lay out each panel. On a flat surface, set two legs down with the angled ends touching the floor. Spread them so the top ends are about 6 inches apart (the upper stretcher length). The lower stretcher lands about 6 inches up from the floor. Measure both diagonals across the panel. When the two diagonals are equal, the panel is square.
Step 3: Attach the stretchers. Run a bead of glue on the end grain of each stretcher, clamp it to the legs in position, and drive two 3-inch screws through the leg face and into the stretcher end. Two screws per connection is enough; three if you want to be sure. Let the glue dry at least 30 minutes before you pick the panel up by the stretcher.
Repeat for the second panel of this horse, then do the same for the second horse.
Assembling the Top Rail
The top rail ties the two leg panels together and takes all the load, so this joint needs both glue and screws.
Attach the gusset blocks. Glue and screw one gusset block flush to each end of the top rail on the underside. The block gives the leg panel a full-face glue surface rather than an edge-grain connection.
Stand the leg panels up. Clamp the top ends of each leg panel to the ends of the top rail with the gusset blocks sandwiched in. Check that the horse is sitting flat on all four feet before you drive any screws. Four screws per side (through the gusset into the leg panel) is the right count.
Check for racking. Set the finished horse on a known-flat surface. If one foot is up, back out one screw, adjust, and re-drive. A slight twist in the top rail is common in construction lumber; you can often correct it by pulling the high leg slightly inward before tightening the last screw.
Making the Design Stackable
The standard shop sawhorse design already stacks reasonably well because the angled legs mean a second horse dropped on top of the first simply rides down and nests inside it. A few small adjustments make this work even better.
Keep the leg-panel spacing consistent. Both horses need the same distance between leg panels or they will not nest. Measure the inside face-to-face distance on your first horse and use it as a template for the second.
Round or chamfer the top corners of the legs. A single pass with a block plane on the top inside corner of each leg removes the sharp edge that can catch and bind when you stack one horse on another.
Store them on their sides. Stacked sawhorses laid on their sides in a corner take up almost no floor space and are stable enough not to fall over.
Getting the Height Right for Your Shop
The 32-inch height in this plan suits most bench-height work and cross-cutting lumber. Here are adjustments for specific uses:
- Finishing work: 34 to 36 inches puts a cabinet door or tabletop closer to eye level so you can see drips and runs while the finish is wet.
- Assembly work: 28 to 30 inches gives you more downward leverage when hand-planing or fitting joints.
- Tall builders: Add 2 inches to the leg length and adjust the lower stretcher height proportionally.
If you are building a matching pair of bookshelves from a single board, a 34-inch sawhorse height makes the finishing and assembly stages much more comfortable than working at floor level.
Frequently Asked Questions
What lumber species should I use for shop sawhorses? Standard dimensional pine or spruce (SPF) construction lumber is the right call. It is cheap, available everywhere, and strong enough for any normal shop load. You do not need hardwood for this project. Avoid boards with large loose knots near the ends of the legs, since a knot there weakens the splay joint.
How much weight can a pair of these sawhorses hold? A well-built pair using this design handles 500 to 600 pounds distributed across both horses without flex you can feel. The load limit in practice is rarely about strength; it is about the horses sliding or racking on the floor. If you are working with very heavy slabs, set the horses on rubber anti-fatigue mat scraps to keep them from creeping.
Can I build these with a hand saw instead of a circular saw? Yes. Mark the 15-degree cut line carefully with a sliding bevel or protractor, clamp the board in a vise, and cut on the waste side of the line. A sharp crosscut hand saw through a 2x4 takes about 30 to 40 seconds per cut. You will have a dozen or so cuts total, so the whole set can be cut by hand in under an hour.
How do I stop the top rail from splitting when I screw into it near the end? Drill a pilot hole slightly smaller than your screw's shank diameter (a 3/32-inch bit works for most 3-inch construction screws) before driving screws within 2 inches of the end of any board. End-grain in pine splits easily under screw pressure without a pilot hole.
Do I need to finish or seal shop sawhorses? No finish is needed for indoor shop use. If the horses will live in a garage or outdoor shed where they will get wet, a coat of exterior latex paint or a penetrating oil like boiled linseed oil will slow the wood from checking. Painting them also makes them easy to spot in a cluttered shop.