Wood Finishing
How to Apply Wood Stain Evenly
Learn how to apply wood stain evenly with the right prep, tools, and technique. Covers wood conditioner, gel stain, and fixing blotchy results.
Getting an even stain finish is one of the trickier parts of woodworking for beginners. The wood looks ready, you open the can, and twenty minutes later you're staring at a splotchy, uneven mess. Understanding why that happens, and what to do before you ever open the stain, makes the difference between a finish you're proud of and one you sand back off.
Why Wood Stains Unevenly
Blotching happens because wood absorbs stain at different rates in different spots. End grain soaks up stain like a sponge. Soft, porous areas in pine, maple, and cherry drink in pigment fast, leaving dark patches next to sections that barely colored at all.
The grain structure is the culprit. Where the grain is more open or the wood is softer, stain penetrates deeper. Tighter grain nearby accepts far less. No amount of careful brushwork fixes this after the fact. You have to address it before the stain goes on.
Sanding grit matters more than most beginners expect. Sand too fine, say 220 grit, and you burnish the surface, closing the pores and making it harder for stain to penetrate at all. Sand to 150 or 180 grit for most hardwoods, then stop. That leaves the pores open enough to accept color without the wild variation you get from unsanded or over-sanded wood.
Choosing the Right Stain for the Job
There are three main stain types, and they behave very differently on the wood surface.
| Stain Type | Open Time | Blotch Risk | Best For |
|---|---|---|---|
| Oil-based | 5-15 min | Medium | Open-grain hardwoods, large flat surfaces |
| Water-based | 2-5 min | High | Light colors, fast turnaround projects |
| Gel stain | Longer, forgiving | Low | Blotch-prone woods, vertical surfaces, pine |
Gel stain sits on top of the wood rather than soaking in, which is why it performs better on problem species. It does not penetrate as deeply as a liquid stain, so the color tends to be more uniform but can look slightly less natural. For pine and cherry, that trade-off is usually worth it.
Water-based stains raise the grain slightly after application. If you use one, wet the wood with plain water first, let it dry completely, then sand lightly with 220 before applying the stain. This pre-raises the grain so the final finish stays smooth.
Pre-Stain Wood Conditioner
Wood conditioner is the single most underused product in a beginner's shop. It partially seals the wood surface before stain goes on, evening out absorption across porous and dense areas. On pine, maple, and cherry especially, it makes a visible difference.
Apply conditioner liberally with a brush or rag, wait the time listed on the label (usually 5 to 15 minutes), then wipe off the excess. Stain needs to go on within 2 hours or the conditioner effect starts to wear off and the wood may need another coat. Do not let conditioner dry completely before staining. That window matters.
Conditioner does reduce how much color the stain deposits. If you want a deeper tone, you may need a second coat of stain, or you can accept that the final color will be slightly lighter than your test sample.
Step-by-Step Application
-
Prepare the surface. Sand to 150 or 180 grit. Remove all dust with a tack cloth or vacuum followed by a dry rag. Any dust or raised grain shows under stain.
-
Apply wood conditioner if needed. Use it on pine, maple, cherry, birch, or any wood with a reputation for blotching. Skip it on open-grain hardwoods like oak or walnut, which absorb stain more evenly on their own.
-
Test on scrap from the same board. This is not optional. Stain color shifts significantly depending on the specific board, your prep, and lighting. A test takes two minutes and saves you from refinishing the actual project.
-
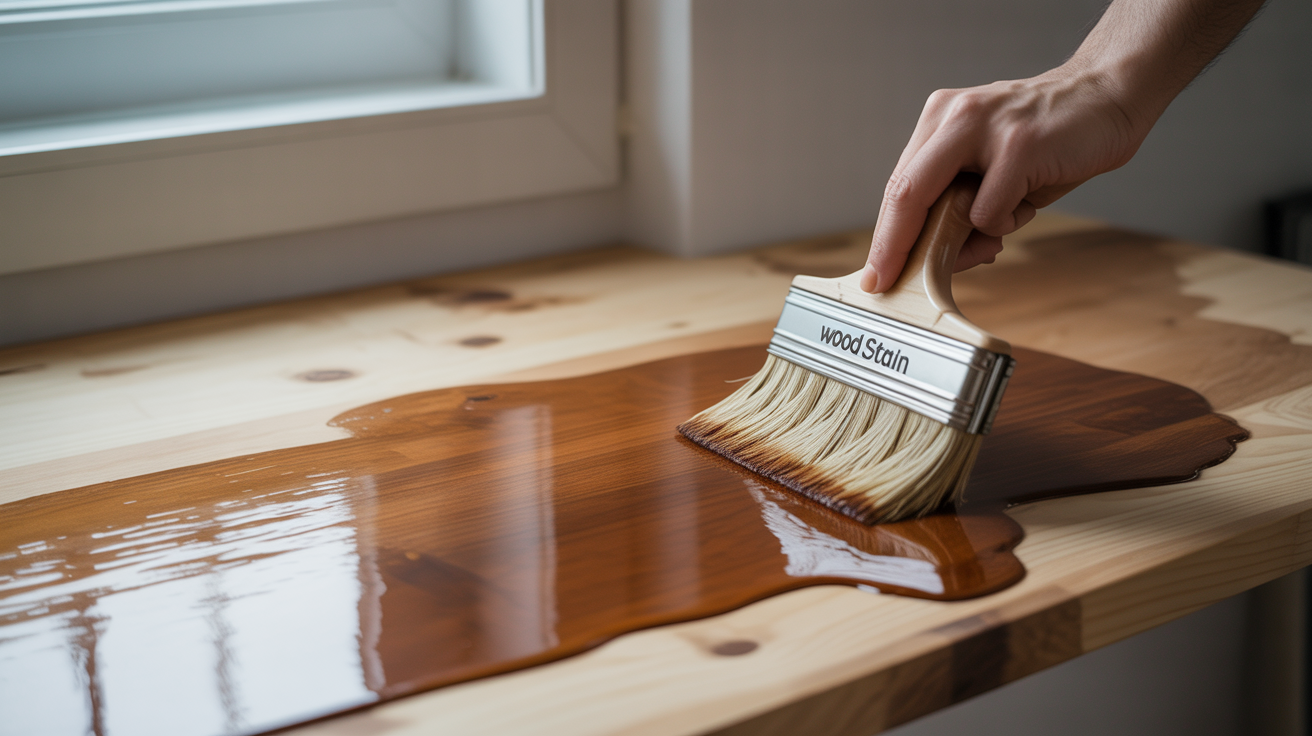
Apply stain with a brush, foam pad, or lint-free rag. Work with the grain. For large surfaces, keep a wet edge to avoid lap marks where one section begins to dry before the next is applied.
-
Wipe off the excess within the open time. This step is where most beginners go wrong. Stain that sits too long soaks in unevenly and can dry sticky. Check the can for the recommended wipe time, typically 3 to 15 minutes depending on the product. Wipe firmly, with the grain.
-
Let it dry fully, then assess. Most oil-based stains need 8 hours or more before a second coat or topcoat. Water-based stains dry faster. Do not rush this.
-
Apply a second coat if needed. A second coat deepens the color. Apply it the same way. The wood absorbs less on the second pass, so the color shift is subtler.
Once you have the color you want, a protective topcoat goes over the stain. Oil finishes like Danish oil can go directly over most stains, or you can use a film finish like polyurethane for better durability. If you go the polyurethane route, the process has its own learning curve; applying polyurethane without brush marks covers that step in detail.
Fixing a Blotchy Stain
If the stain is already on and the result looks uneven, you have a few options depending on how bad it is.
For minor blotchiness, a second coat of gel stain applied over the dried first coat often unifies the color. Gel stain's thicker consistency fills in the lighter patches without darkening the already-saturated areas as dramatically.
For severe blotching, you may need to strip back and start over. Sand down to bare wood, starting at 80 grit to cut through the finish layer, then working back up to 150. This time, use a pre-stain conditioner, or switch to gel stain entirely.
A toner (stain mixed into a clear finish and applied by spray or foam pad) is another option for evening out color after the fact. It takes more skill to apply without looking artificial, but it can rescue a piece that would otherwise need full stripping.
Oil-Based Stain and Fire Safety
Oil-based stains are petroleum-based products, and the rags you use to apply or wipe them are a serious fire risk. Rags soaked in oil-based stain can self-combust through oxidation as they dry, especially when bunched or piled together. This is not a rare accident; it happens in workshops regularly.
After use, lay rags flat outdoors in a single layer until they are completely dry and stiff. Alternatively, submerge them in water in a metal container with a lid. Once dry and hardened, they can be disposed of with regular trash in most areas. Never stuff used oily rags into a bin, plastic bag, or corner of the shop and leave them overnight.
Frequently Asked Questions
How long should I wait between coats of stain?
For oil-based stain, wait at least 8 hours, and up to 24 if conditions are cool or humid. Water-based stain typically needs 2 to 4 hours. The wood should feel dry to the touch with no tacky spots before you add another coat or apply a topcoat.
Can I apply stain over old stain or an existing finish?
You can apply a fresh coat of stain over a previous coat that has fully dried, but stain will not penetrate through an old clear finish like polyurethane or lacquer. If the wood has a film finish on it, you need to strip or sand through that layer first to get the stain to take.
Why did my stain dry sticky and not wipe off?
This usually means the excess stain was left on too long and started to cure on the surface. Try wiping with a rag dampened with mineral spirits (for oil-based stain) or water (for water-based). If that does not work, a light scuff with 220 grit and another application, this time wiped off sooner, often corrects it.
Is gel stain as durable as regular stain?
Gel stain and liquid stain are both penetrating colorants and provide no structural protection on their own. Durability comes from the topcoat you apply over them. Either stain type needs a clear finish on top, whether that is oil, varnish, lacquer, or polyurethane.
Do I need to seal the wood after staining?
Yes. Stain colors the wood but does not protect it from moisture, wear, or UV damage. Apply a clear protective finish over dried stain before the piece goes into use. The topcoat you choose affects the final sheen and feel of the surface, so factor that into your finishing plan from the start.