Wood Finishing
How to Fix Common Wood Finishing Mistakes
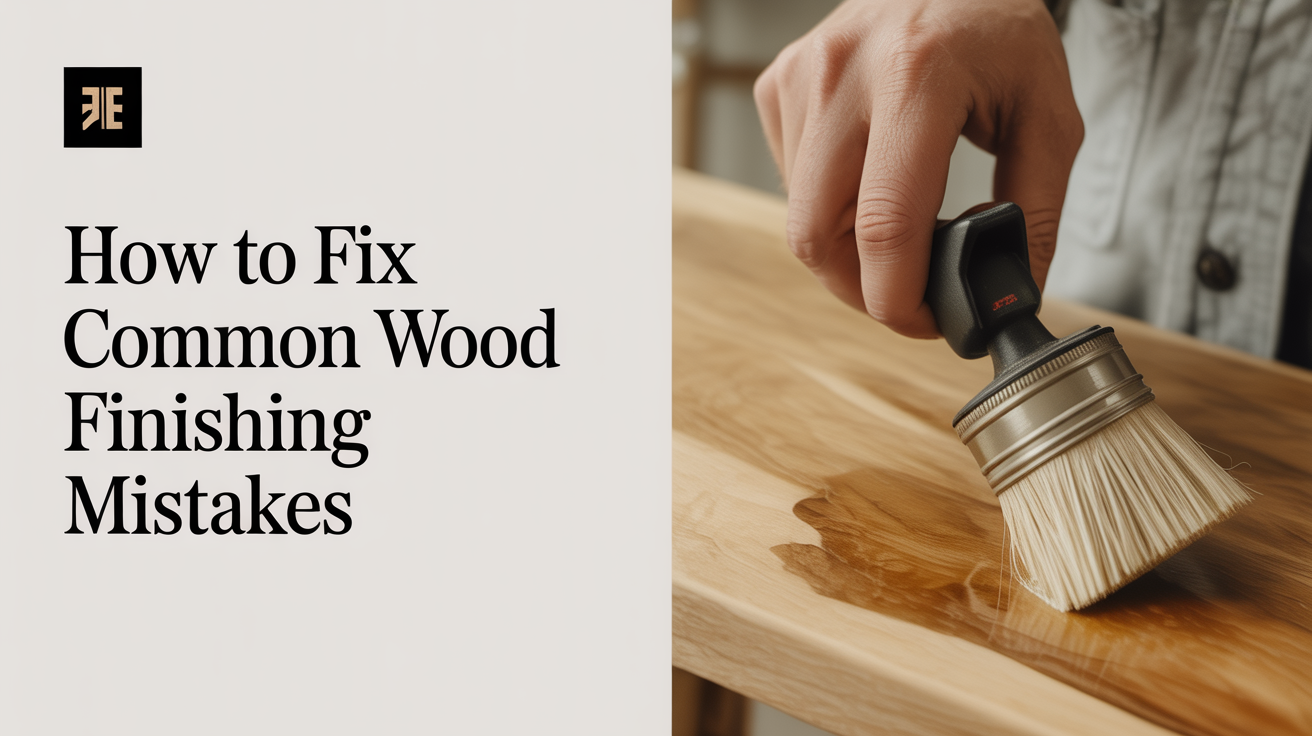
Learn how to fix blotchy stain, brush marks, runs, fisheye, and other common wood finishing mistakes before they ruin your project.
Most wood finishing mistakes are fixable if you catch them early. This guide covers the most common problems, what causes each one, and how to correct them without starting over.
Quick Reference: Common Finishing Problems
| Problem | Most Likely Cause | Fix |
|---|---|---|
| Blotchy stain | Uneven wood porosity (pine, soft maple, cherry) | Pre-conditioner or gel stain; sand back and retry |
| Brush marks in finish | Finish drying too fast; wrong brush | Scuff with 320-grit, thin slightly, use quality brush |
| Runs and drips | Too much finish applied at once | Let cure fully, sand flat, recoat thin |
| Fisheye | Silicone or oil contamination on surface | Clean with naphtha; add fisheye eliminator to next coat |
| Cloudy or milky finish | Moisture trapped during cure | Light scuff, recoat in dry conditions |
| Dust nibs | Airborne dust settling before finish cures | Scuff with 400-grit, recoat in cleaner environment |
| Tacky finish that won't dry | Too much product applied; high humidity | Thin wipe-on coats; improve ventilation and warmth |
Fixing a Blotchy or Uneven Stain
Blotching happens most often on soft, fine-grained woods like pine, soft maple, poplar, and cherry. These species have areas of tight grain and open grain sitting side by side. They absorb stain at very different rates. The result is a splotchy, uneven look that gets worse with darker colors.
Before you stain, use a wood conditioner. Pre-conditioner fills the more porous grain cells with a dilute finish, slowing absorption so the stain goes on more evenly. Apply it, wait 5 to 15 minutes, then stain while the conditioner is still slightly tacky. Read the label since the open window varies by brand.
Gel stain is another solid option. Gel stain sits on the surface rather than soaking in, so porosity differences matter less. It takes more coats to build color, but the result is far more even on problem species. Most gel stains wipe on with a rag and wipe off, the same as regular stain.
If you already have a blotchy surface, your choices are:
- Sand back to bare wood (start at 120-grit, work up to 180) and start over with conditioner
- Apply a very thin wash coat of shellac (1 lb cut, or dilute dewaxed shellac 1:1 with denatured alcohol), let it dry completely, then re-stain on top
- Accept the variation and apply a darker topcoat color to visually unify the surface
Good prep work is the most reliable way to avoid blotching in the first place. See how to sand wood properly before finishing for the full sanding sequence and how to read grain direction before you open the stain can.
Getting Rid of Brush Marks and Runs
Brush marks in a topcoat look like fine ridges frozen in the dried film. Runs and drips are thick lines or curtains where too much finish pooled before it set.
Brush marks usually trace back to one of three things: the finish drying before it can level out, a low-quality brush, or a coat applied too thick. Water-based finishes are especially prone to this because they flash off fast.
To fix brush marks:
- Let the coat fully cure (at least 24 hours for water-based, longer for oil-based).
- Scuff lightly with 320-grit sandpaper, sanding with the grain until the surface feels smooth to your fingertip. You are only knocking down the ridges, not removing the whole coat.
- Wipe off the dust with a tack cloth.
- Thin your next coat slightly (5 to 10 percent with the correct thinner) and apply with a quality China bristle brush for oil-based, or a fine foam or nylon brush for water-based.
- Work in long, overlapping strokes and tip off lightly with the grain at the end.
Runs and drips cure hard, so sanding is the only fix. Use 220-grit wrapped around a flat block and sand across the run until the surface is level. Switch to 320-grit to blend the repair, then recoat thin. The key is waiting for the drip to fully cure first; trying to sand a soft drip creates more of a mess.
For more on applying finish without brush marks, how to apply wood stain evenly covers brush technique, wiping method, and working with grain direction.
Fisheye, Cloudy Finish, and Silicone Contamination
Fisheye looks like small craters or circular divots in your finish. Silicone contamination is almost always the cause. It comes from aerosol furniture polish, some paste waxes, skin lotion transferred from your hands, or silicone-based lubricants used near the workbench. Even a small amount spreads across a large surface and repels finish.
How to fix it:
- If the finish is still wet, wipe it off completely with mineral spirits and start over. Clean the bare surface with naphtha, which evaporates cleanly and lifts silicone better than mineral spirits alone.
- If it has dried, scuff sand, clean again with naphtha, and add a small amount of fisheye eliminator to your next coat. This is a silicone additive that helps the finish flow through contamination. Use it sparingly; too much can make future coats fisheye intentionally.
- Prevention is far easier than repair: keep silicone products out of the finishing area and wipe down all surfaces with naphtha before the first coat.
Cloudy or milky finish in water-based products usually means moisture got trapped in the film during cure. This happens in humid shops or when coats go on too thick on a damp day. A light scuff with 400-grit and a fresh coat in drier conditions often clears it up. If the cloudiness runs through multiple layers, you may need to sand back further and recoat when your shop is below 70 percent humidity.
Oil-based varnish that cures milky usually sat in a cold environment (below 50F) while drying. Move the piece somewhere warmer and wait a few days. The cloudiness often resolves on its own.
Tacky Finish, Dust Nibs, and Drying Problems
A finish that stays tacky and won't harden is one of the more frustrating problems. Common causes include:
- Too much product applied at once (especially with Danish oil or oil/varnish blends)
- High humidity slowing solvent evaporation
- Contaminated thinner or old, partially-gelled finish from the can
- Oil-based finish applied over a water-based sealer that had not fully cured
For oil finishes, the fix is usually to wipe the surface with mineral spirits to remove excess oil, then let it dry in a warm, ventilated space. Applying thin wipe-on coats from the start prevents this problem entirely. See oil finishes explained: tung, linseed, and danish oil for guidance on application amounts and how long to wait between coats.
For film-building finishes like polyurethane, lacquer, or varnish, sanding off the tacky layer and recoating is the only reliable fix. Make sure your shop temperature is above 65F and humidity is below 70 percent, then apply thinner coats.
Dust nibs are tiny bumps in dried finish caused by airborne particles settling before the surface cured. They are nearly unavoidable in a typical shop, but easy to remove. Wait for the coat to cure fully, then sand lightly with 400-grit stearated sandpaper (the gray kind marked "no-fill" or similar). The nibs come off quickly. Wipe clean with a tack cloth and recoat. If your shop runs dusty, let the finish flash for 10 minutes after application before walking away, and limit foot traffic while it cures.
Frequently Asked Questions
Can I apply a new coat of finish over a bad one without sanding?
Not reliably. Sanding between coats gives the new coat a mechanical grip on the old one. Skipping it leads to peeling, fisheye, or a finish that looks worse than the layer you were trying to cover. A quick scuff with 320-grit takes a few minutes and makes a real difference to adhesion.
My stain dried unevenly and I already applied a topcoat. Now what?
You have two choices: sand back to bare wood and start over, or apply a compatible, slightly darker tinted product to even out the variation. The second option only works if you are okay with the color shifting darker. Sanding back is more work but gives the cleanest result with full control over the final color.
Why does my oil-based finish smell bad and stay tacky after two weeks?
Old or contaminated finish is usually the culprit. Oil-based products have a shelf life of about one to two years once opened. Pour a small amount into a separate container rather than dipping your brush straight into the can, and seal the lid tightly after each use. If the finish has skinned over or smells rancid, replace the can.
How long should I wait between coats?
Follow the manufacturer's recommendation, then add time if your shop is cool or humid. A reliable test: press your fingernail firmly into an inconspicuous area. If the coat dents easily, it needs more time. Film-building finishes should feel hard, not rubbery, before you sand and recoat.
Is it possible to fix a scratched topcoat without stripping the whole piece?
Yes, for light surface scratches. Clean the area, scuff the whole panel lightly with 400-grit, and apply a fresh coat. Feathering the repair into the surrounding finish takes a bit of practice, but on flat panels it works well. Deep scratches that go through the finish into the wood need to be filled with a grain filler or finish marker before recoating.