Power Tools
How to Use a Drill and Driver Like a Pro
Learn how to use a drill and impact driver correctly: pilot holes, clutch settings, bit types, and avoiding stripped screws or split wood.
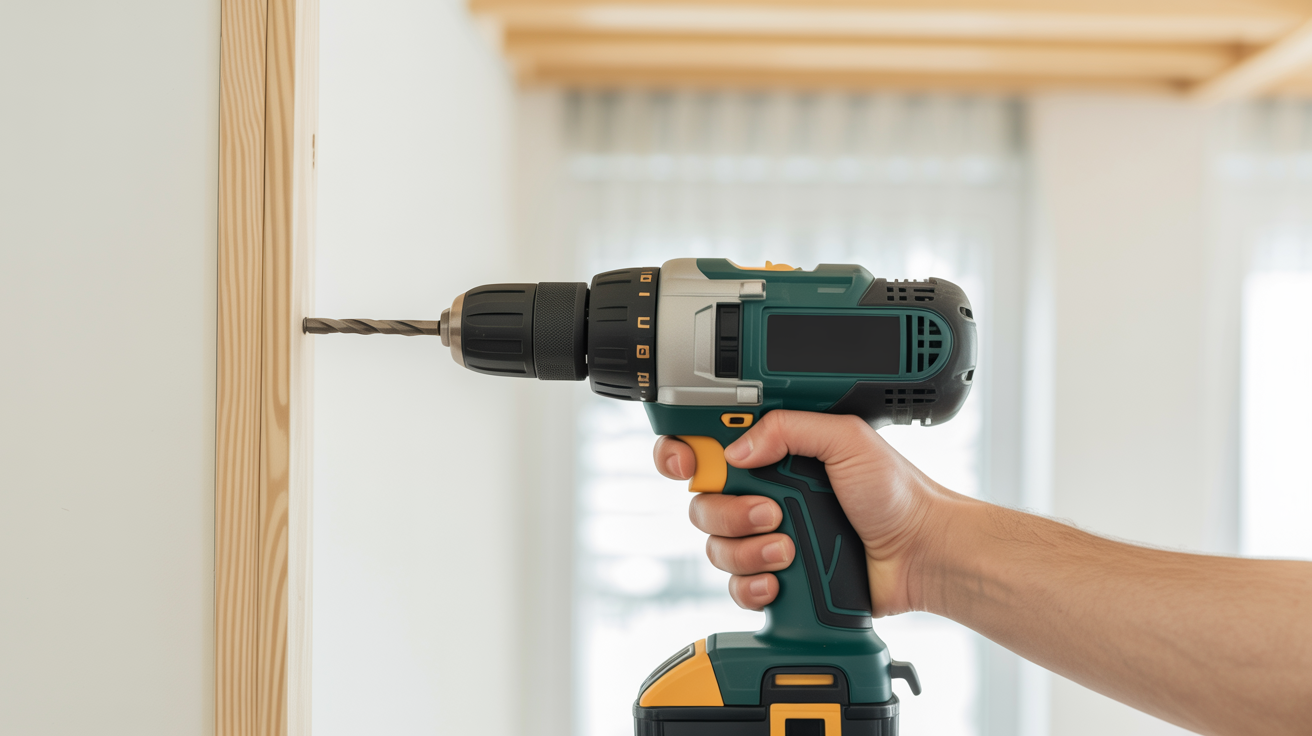
A cordless drill and an impact driver look similar hanging on the pegboard, and beginners often treat them as interchangeable. They aren't. Understanding the difference between the two, and knowing when each one belongs in your hand, will save you more split boards and stripped screw heads than almost any other lesson in the shop.
Before getting into technique, keep one principle close: the tool does very little of the work when it's set up correctly. The bit stays seated, the clutch slips at the right moment, and the wood stays whole. Most beginner mistakes happen before the trigger is pulled.
Drill vs Impact Driver: What's Actually Different
A drill/driver has a keyed or keyless chuck that accepts round-shank bits in virtually any diameter. It applies smooth rotational torque and relies on its adjustable clutch to limit that torque before the screw strips or the fastener bottoms out.
An impact driver uses a 1/4" hex collet and works through a hammer-and-anvil mechanism inside the head. When resistance builds, it delivers rapid rotational impacts rather than constant torque. That mechanism is what lets a compact impact driver sink a 3" structural screw or a lag bolt with almost no wrist strain. The downside: there's no clutch, so fine control near the surface of soft wood requires a light touch on the trigger.
| Feature | Drill/Driver | Impact Driver |
|---|---|---|
| Chuck type | Keyless, accepts round or hex shanks | 1/4" hex collet only |
| Torque delivery | Smooth, continuous | Pulsed impacts under load |
| Clutch / slip | Yes, numbered settings 1-20+ | No clutch |
| Best for | Drilling holes, driving shorter screws | Long screws, lag bolts, repetitive fastening |
| Risk | Cam-out if clutch set too high | Overdriving flush or proud screws |
| Bit types | Twist, brad-point, spade, hole saw | 1/4" hex impact-rated bits only |
For most beginner projects, a single drill/driver handles everything. Add an impact driver when you're building something structural or driving dozens of deck screws.
Clutch Settings and Why They Matter
The numbered ring behind the chuck on a drill is the clutch collar. Lower numbers mean the clutch slips earlier, limiting torque. Higher numbers let more torque through before slipping. The drill symbol (a picture of a drill bit, usually the highest setting) locks the clutch entirely for boring holes.
Start lower than you think you need. Set it around 6-8 for driving #8 wood screws into pine, then increase if the clutch slips before the head seats flush. This is easier to demonstrate than describe: you'll hear a ratcheting click when the clutch releases, and the screw will stop moving. If that happens too early, bump the number up by two and try again.
Never use the drill symbol setting to drive screws. Without clutch engagement, you'll either strip the head or drive the fastener so deep it tears out the wood fibers around it.
Pilot Holes: The Step Most Beginners Skip
Splitting a board near the end grain is the most common beginner drilling mistake, and a pilot hole prevents it almost every time. Wood fibers don't compress easily along their length; a screw driven without a pilot essentially acts as a wedge, forcing those fibers apart.
Two different holes serve two different purposes here:
Pilot hole: Sized slightly smaller than the screw's thread diameter. It gives the threads something to bite into while removing just enough material that the wood doesn't split. Use a brad-point bit rather than a twist bit in wood; the center point keeps it from wandering on the surface.
Clearance hole: Drilled through the top piece of wood only, sized to match the screw's shank (the smooth part below the head). Without a clearance hole, the threads in the top piece resist downward movement, and the two boards never clamp together tightly.
Common Pilot Hole Sizes for Wood Screws
| Screw Gauge | Pilot Hole (Softwood) | Pilot Hole (Hardwood) | Clearance Hole |
|---|---|---|---|
| #6 | 3/32" | 7/64" | 9/64" |
| #8 | 7/64" | 1/8" | 11/64" |
| #10 | 1/8" | 9/64" | 3/16" |
| #12 | 9/64" | 5/32" | 7/32" |
| 1/4" lag | 3/16" | 7/32" | 1/4" |
These are starting points, not absolutes. Denser hardwoods like oak and maple need slightly larger pilot holes than the table suggests. When in doubt, test on a scrap from the same board.
Countersinking and Getting a Flush Head
A pilot hole alone won't seat a flat-head screw flush with the surface. That requires countersinking: cutting a tapered recess that matches the angle under the screw head. Combination countersink bits do both steps in one pass and are worth having in a dedicated holder so you reach for them automatically.
Depth matters. Drill too shallow and the head sits proud; too deep and you've created a weak spot in the wood. The head should sit exactly flush or just barely below the surface. On finished work, a slightly recessed head lets you fill with wood putty; on construction work, flush is fine.
For pocket-hole joinery, a dedicated pocket-hole jig sets its own depth stop and angle, so countersinking happens automatically. That's a topic large enough for its own article.
Keeping the Bit Seated: How to Avoid Cam-Out
Cam-out is what happens when a bit slips out of a screw head under load, chewing up the recess until it's useless. A few habits prevent it almost entirely:
- Use impact-rated bits for driving screws. Standard bits flex under impact; rated ones have a torsion zone that absorbs the load without shattering or deforming.
- Keep the driver collinear with the screw. Angling off-axis puts uneven pressure on one side of the recess and the bit walks out.
- Apply firm forward pressure before squeezing the trigger. The bit needs to be seated in the recess, not resting on it.
- Match the bit to the screw head. A #2 Phillips in a #3 recess will cam out immediately. When in doubt, hold the bit against the head in good light and look for a solid fit.
- Use square-drive (Robertson) or Torx screws where you have a choice. They resist cam-out far better than Phillips heads.
If a screw head is already stripped, stop. Driving harder makes it worse. Try a rubber band pressed between the bit and the recess for extra grip, or use a screw extractor.
Drilling Holes: Bit Selection and Technique
For boring through wood, match the bit type to the task:
- Brad-point bits are the standard choice for woodworking. The center spur registers on a marked point and the outer spurs score a clean entry hole without tearout. Use these for dowel holes and anywhere you need accuracy.
- Twist bits work in wood but tend to wander on the surface without a center punch. They're better suited to metal and general construction where precision matters less.
- Spade bits bore large diameter holes quickly but leave rough edges. Use them where the hole will be hidden (running wires, pipe clearances) rather than in finished work.
- Forstner bits leave a flat-bottomed, clean-edged hole. They're slower and more expensive but the right tool for shelf-pin holes, hinge cup recesses, and any application where appearance counts.
Set the drill to a medium speed for wood. High speeds generate heat and can scorch the wood or dull the bit faster than necessary. Back the bit out periodically on deep holes to clear chips; a clogged flute makes the bit work harder and wander.
Clamp or secure your workpiece before drilling. A board that spins free when the bit catches can cause a serious injury, and it doesn't do the workpiece any favors either. For more on handling sheet goods and smaller boards safely, see our guide on circular saw basics for accurate cuts.
A Few Situations Where Each Tool Wins
Running long structural screws (2.5" or longer) into framing, hardware, or treated lumber? The impact driver's pulsed mechanism drives them without bogging down. Assembling a cabinet carcass with short pocket screws? The drill/driver's clutch gives you the finesse to stop at flush.
Mixing the two is common in a working shop. Some woodworkers pre-drill with the drill/driver (using a brad-point bit in the chuck) and then switch to the impact driver to drive the screw fast. It adds a step but is fast once you develop the habit, and it's the reliable way to avoid tearout on hardwoods.
Once you're comfortable with bits and torque, you'll find a similar pattern of setup-before-trigger in other power tools. The router, for example, requires the same attention to bit seating and depth before you touch the power switch. If you've landed here after picking up a router, our beginner's guide to using a router covers that setup process in detail. And for smoothing surfaces after assembly, the random orbital sander guide walks through grit progression and avoiding swirl marks.
Frequently Asked Questions
Do I need both a drill and an impact driver, or will one do?
For most beginner woodworkers building furniture or small projects, a single drill/driver handles drilling and driving with enough control. An impact driver becomes genuinely useful when you're driving a lot of long screws, working with structural fasteners, or getting fatigued from manual torque. Buy the drill first; add the impact driver when you find yourself fighting screws repeatedly.
Why does my screw keep stripping before it's fully seated?
The two likeliest causes are a clutch set too high (not slipping soon enough) or a bit that doesn't fit the screw head snugly. Check the bit size first, then dial the clutch back a few numbers. If the screw is seated flush but the clutch is still slipping, the bit is driving fine; the head simply caught before the clutch released.
Can I use regular twist bits in an impact driver?
Standard twist bits with round shanks don't fit the 1/4" hex collet at all. You need hex-shank bits specifically designed for impact drivers. For drilling holes, most woodworkers use the drill/driver with a brad-point or twist bit rather than adapting an impact driver for that job.
How close to the edge can I drive a screw without splitting the wood?
A general rule is to stay at least 1" from the end and 1/2" from the long-grain edge. In hardwoods or near figured grain, go farther and always drill a pilot hole first. The closer to the end, the more likely the wood splits even with a pilot hole, so consider relocating the fastener or switching to a dowel joint if the screw placement is unavoidable.
My drill walks around when I try to start a hole in a marked spot. What's wrong?
Without a center punch mark, a twist bit has nothing to register on and wanders across the surface. Switch to a brad-point bit (it has a sharp center spur that holds position), or use an awl to create a small divot at your mark before drilling. Dimpling the surface first takes five seconds and eliminates the problem entirely.