Hand Tools
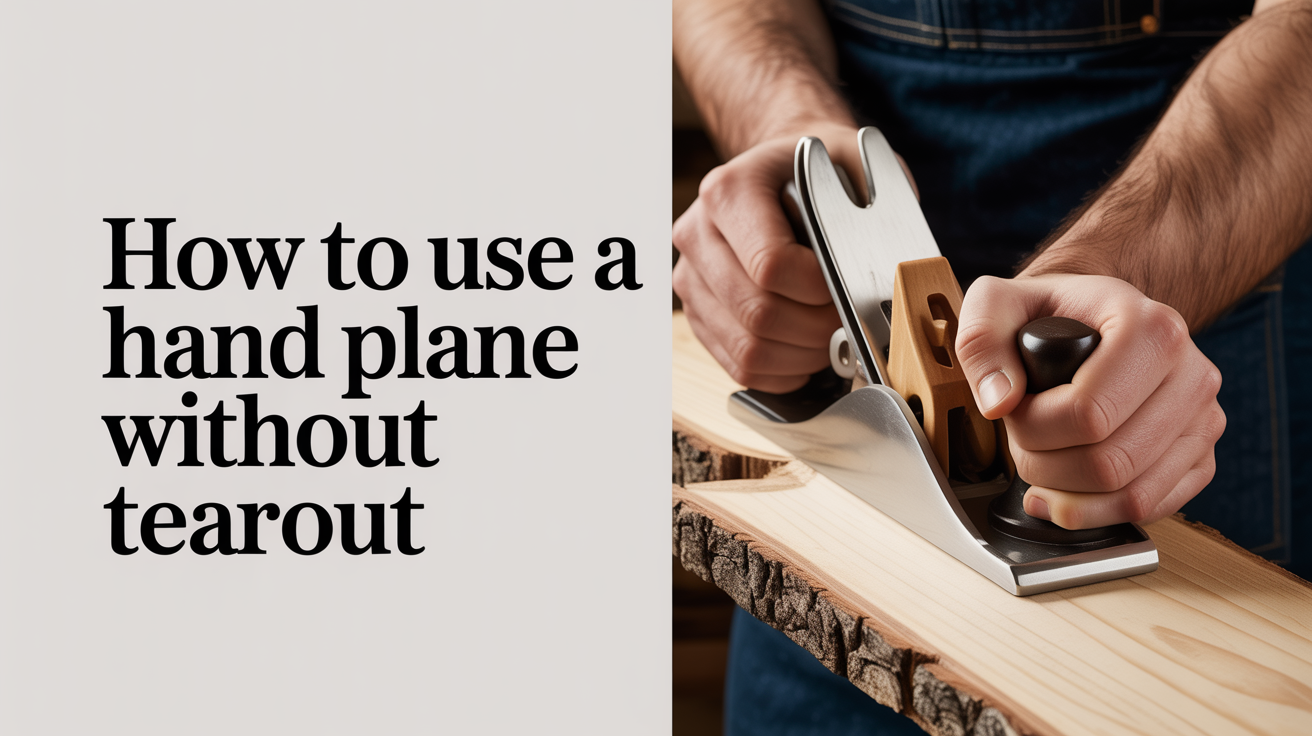
How to Use a Hand Plane Without Tearout
Stop tearout ruining your hand-planed surfaces. Learn grain direction, chipbreaker setting, skewing technique, and blade prep for clean results.
Tearout is the #1 reason beginners swear off hand planes. The good news: it is almost always preventable, and understanding why it happens makes the fix obvious. This guide walks through the practical mechanics of how to use a hand plane so the blade lifts a clean shaving rather than ripping fibres out of your board.
Why Tearout Happens in the First Place
Wood fibres run in a direction. When your plane blade moves against that grain, it tends to lever fibres up ahead of the cut rather than slicing them cleanly. Think of stroking a cat from tail to head versus head to tail. The fibres want to tear away from the surface, leaving pits and ragged gouges instead of a smooth face.
Harder, straight-grained woods like hard maple or beech are more forgiving. Figured woods, interlocked grain, and softer species like pine punish any error in technique. Knowing which you are dealing with before you start is half the battle.
Reading Grain Direction Before You Push the Plane
Hold the board up to a raking light at roughly 45 degrees and look along the surface. The grain lines on the edge of the board are your clearest guide: plane in the direction the lines angle up toward you. Another way to think about it: the wood fibres should be swept down and back by the blade, not lifted and torn forward.
On quartersawn lumber the long-grain lines run nearly vertical on the face, and direction matters less. On flatsawn boards, particularly near cathedrals, you may have competing grain directions on the same face. Here, technique matters more than direction.
A few things to look for:
- Edge grain as a compass. The lines on the long edge of the board show grain angle directly.
- Surface sheen. Planing with the grain produces a consistent sheen; against it leaves dull, scratched-looking patches.
- Light tear. Take a single light shaving and inspect. A little fuzz means you are reading it wrong; flip 180 degrees and try again.
- Figure. Curly, birdseye, or crotch figure has wildly changing grain direction. No single pass direction works everywhere; you need a different strategy (see the sections on skewing and mouth width below).
Setting Up the Plane for a Fine Cut
No amount of technique rescues a poorly set plane. The two adjustments that matter most for preventing hand plane tearout are blade projection and chipbreaker position.
Blade Projection
For the final smoothing pass, set the blade so it takes a shaving you can almost see through. Hold the plane sole toward a light, sight down it, and back the blade off until you can barely see it projecting. Advance it in tiny increments (a tap on the tote end of the iron, or a quarter-turn of the adjuster) until a test shaving comes off between 0.002 and 0.004 inches thick. That sounds precise but in practice it feels like tissue paper, not cardstock.
A heavier cut on difficult grain almost always tears. Thinner shavings give the blade less opportunity to lever fibres.
The Chipbreaker
The chipbreaker (cap iron) is not decoration. Set close to the edge, it breaks the shaving before it can travel far enough up the blade to lever fibres out of the surface. For most bench work, 1/16 inch back from the edge is fine. On troublesome figured wood, close it to 1/32 inch or even 1/64 inch. The chipbreaker must seat flat against the iron face with no gap; a gap packs with shavings and causes blockages.
The chipbreaker is also the most overlooked variable when someone complains about tearout. Check the fit before anything else.
Mouth Width
Tighter mouth openings support the wood fibres just ahead of the cutting edge, reducing tearout on difficult grain. On a metal bench plane, advance the frog slightly to narrow the mouth. On a wooden plane, the escapement is fixed, but a tighter mouth is why well-fitted wooden smoothers often outperform metal planes on figured stock.
For a #4 or #4-1/2 smoother, a mouth opening of about 1/32 inch works well for fine finishing on tricky grain.
The Role of a Sharp Edge
A dull blade tears rather than cuts, full stop. If you are getting tearout on wood that should plane cleanly, sharpening is probably your actual problem. A polished bevel and a flat back produce a geometry sharp enough to sever fibres cleanly; a scratchy edge grabs and rips them.
Sharpen the back of the iron flat through at least 8000-grit. The bevel angle matters less than people claim, but 25 degrees primary with a 30-degree microbevel is a sensible starting point for softwoods; bump to 30/35 for hardwoods.
Sharpening chisels follows exactly the same back-flattening and honing sequence as plane irons, and the muscle memory transfers directly. If you have that process wired in for chisels, your plane irons will improve immediately.
Bench Plane Technique: Skewing, Pressure, and Stance
With grain direction right and the plane set fine, technique closes the remaining gap.
Skew the plane. Rotating the plane 20 to 45 degrees relative to the direction of travel lowers the effective cutting angle and produces a slicing action rather than a scraping chop. This is the single most reliable trick for tricky grain. The shaving will curl off at an angle; that is normal.
Weight on the front knob at the start, shift to the tote at the finish. At the beginning of a stroke the blade has not fully engaged and is likely to tip down, digging the nose in. Lean on the knob. By mid-stroke, distribute pressure evenly. At the end, shift weight to the rear so the tail does not drop off the edge.
Slow down. Many beginners push fast. A deliberate, controlled stroke gives you better feedback through your hands and produces a more consistent shaving.
Track the whole surface. Work diagonally, overlapping passes by about a third of the plane width. Stagger the starting points to avoid scallop marks at the plane's nose.
Here is a quick reference for common plane types and where each fits in bench plane technique:
| Plane | Typical Length | Primary Use | Cut Setting |
|---|---|---|---|
| #5 Jack | 14 in | Rapid stock removal, flattening | Cambered iron, coarse |
| #6 Fore | 18 in | Intermediate smoothing, edge jointing | Slight camber or straight, medium |
| #7/#8 Jointer | 22-24 in | Jointing edges flat and straight | Straight iron, medium-fine |
| #4 Smoother | 9-10 in | Final surface smoothing | Straight iron, very fine |
| #4-1/2 Heavy Smoother | 10 in | Final smoothing on hardwoods/figured stock | Straight iron, very fine, tighter mouth |
A #4 smoother with a tight mouth and sharp iron set for a 0.002-inch shaving is the right tool for the final pass on most cabinet work. The jack takes the board down fast and leaves tracks; the smoother removes them.
When to Change Strategy
Some wood simply will not plane cleanly in any direction. Highly figured maple, wild-grain cherry near knots, and reversing grain on elm are examples. You have a few options:
- Higher cutting angle. A bevel-up plane (like the Veritas BU Jack or a #60-1/2 block plane used on end grain) lets you swap irons to a 50 or 55-degree cutting angle. This is the most effective fix for difficult interlocked grain.
- Cabinet scraper. A well-tuned card scraper produces a glass-smooth surface on figured wood that no plane will cleanly touch. It is not a retreat; it is the appropriate tool.
- Winding sticks first. A twisted board will fight you regardless of technique. Get it flat before you worry about tearout.
Choosing the right hand tools before you buy is worth thinking through carefully, and the same logic applies to planes: a quality #4 smoother with a tight frog will serve you better than a drawer full of bargain bench planes.
Planing wood by hand also complements good sawing practice. Clean edges from a well-used handsaw reduce the material the plane has to remove. A few fundamentals about hand saw technique pay dividends the moment you pick up the plane.
Frequently Asked Questions
Why does my plane leave ridges down the middle of the board?
The iron is probably set unevenly, with one corner projecting more than the other. Sight down the sole, tap the lateral adjust lever toward the high side, and recheck. On a vintage plane, check whether the frog seating surface is clean; debris under the frog causes this.
Can I plane against the grain if I set the blade finely enough?
You can reduce tearout by thinning the shaving, closing the mouth, and setting the chipbreaker very close to the edge, but on most woods you will still get some tear if you plane into the grain. The better fix is changing direction, skewing more aggressively, or switching to a scraper.
How do I know the chipbreaker is set close enough?
Remove the iron assembly and hold it up to light. If you can see any light between the chipbreaker and the iron face, the fit is not tight enough. The chipbreaker should sit completely flush with no visible gap, then be positioned 1/32 to 1/16 inch back from the cutting edge.
My plane chatters and skips. Is that a tearout issue?
Chatter is a separate problem: the iron is not clamped rigidly enough. Check that the lever cap is snug (firm thumb pressure, not gorilla grip), the frog is fully seated, and the cap iron screw is tight. A loose frog on vintage planes causes pronounced chatter on hardwoods.
What grit should I finish sharpening a plane iron to?
For smoothing-plane work, finish at 8000-grit waterstone or equivalent. Strop on bare leather afterward. The polished edge slices cleanly; a 1000-grit edge still scratches fibres and contributes to tearout on demanding grain. The honing takes three minutes once you have the motion dialed in.