Hand Tools
How to Use a Hand Saw for Straight, Clean Cuts
Learn hand saw technique from grip to follow-through: rip vs crosscut geometry, starting the kerf, staying square, and avoiding common beginner mistakes.
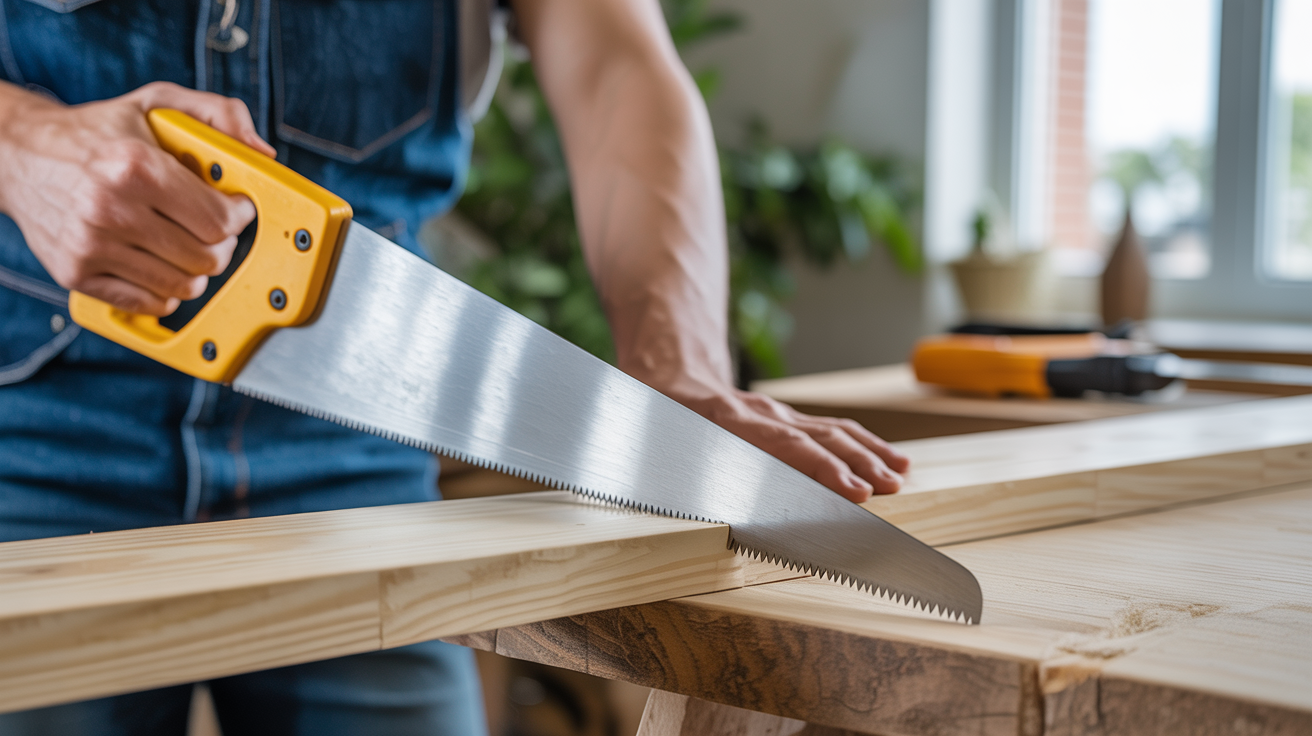
A hand saw looks simple enough that most beginners skip learning it properly. Then the first cut drifts, the blade binds, and the board ends up with a ragged edge that no amount of sanding quite fixes. Good hand saw technique is a short list of things done in order, and once you have it, a sharp saw through dry wood feels almost effortless.
Choosing the Right Saw Before You Pick It Up
The single biggest factor in a clean cut is starting with the correct saw for the job. Using a rip saw to crosscut a board is like trying to cut steak with a butter knife: the geometry is simply wrong.
| Saw Type | Tooth Geometry | TPI | Best For |
|---|---|---|---|
| Rip saw | Near-vertical rake, chisel-shaped teeth | 4-6 | Cutting along the grain (ripping boards to width) |
| Crosscut saw | Angled, knife-shaped teeth | 8-12 | Cutting across the grain (shortening boards) |
| Panel saw | Crosscut geometry, shorter plate | 10-12 | General crosscutting, thinner stock |
| Backsaw / tenon saw | Fine crosscut teeth, stiffened spine | 12-16 | Joinery, shoulders, precise crosscuts in a miter box |
| Dovetail saw | Very fine crosscut or rip teeth | 18-22 | Dovetail layout lines, fine joinery |
| Japanese pull saw | Thin plate, pull-stroke, crosscut or rip | 14-20 | Precise work, especially in soft to medium hardwoods |
Rip teeth scrape and gouge along the grain fibers; crosscut teeth slice across them like tiny knives. Using a rip saw on a crosscut leaves torn, fuzzy fibers. Using a crosscut saw to rip is slow and the teeth can bind in the kerf. Match the saw to the cut first, and half of your technique problems disappear.
TPI (teeth per inch) governs speed versus finish. Lower TPI removes more material per stroke but leaves a rougher surface. Higher TPI cuts more slowly and leaves a cleaner edge. For furniture parts that need a finished surface, a 12-14 TPI crosscut or a fine backsaw is worth the extra strokes.
Marking and Preparing the Cut Line
A saw cut is only as accurate as the line it follows. A pencil line alone is not good enough for joinery. Mark your cut with a marking knife against a square, then deepen it with a second pass. This severs the wood fibers at the surface and gives the saw teeth a physical groove to register in. The knife line also tells you exactly which side of the line is waste.
Always cut on the waste side. The saw kerf itself removes material, typically 0.5-1 mm depending on the plate thickness. If you cut down the center of your line, your piece comes out short by roughly that kerf width. Mark the waste side with a small X after you lay out your line. You will always cut so the kerf is entirely within the X.
If your saw has no spine and you are making a freehand cut in wide stock, clamping a straightedge or a piece of square stock to the workpiece gives a fence for the saw plate to ride against. This is not cheating; it is how professionals hold tolerance on freehand cuts.
How to Start the Kerf
This is where beginners go wrong most often. They try to start the saw with a full-length forward stroke and it skips across the face, scratching the wood outside the line.
Place your thumb nail against the flat of the plate, right at the knife line. With a Western push saw, draw the saw back toward you using just the heel of the blade, very light pressure, two or three short strokes. You are creating a small notch. Only once that notch is established do you begin longer strokes.
With a Japanese pull saw, the same principle applies in reverse: light pull strokes with the tip of the blade to open the kerf, then lengthen the stroke as the groove deepens.
Keep the saw at a low angle to the wood surface during starting, around 15-20 degrees. A low angle gives more control and is less likely to skitter. As the kerf deepens, you can raise the angle to 45 degrees for efficient cutting.
The Cutting Stroke: Technique Sequence
Once the kerf is established, the motion becomes rhythmic. Here is the sequence:
- Grip the handle with your index finger extended along the side of the handle, pointing toward the cut. This finger acts like a gunsight and naturally steers the saw.
- Stand slightly to the side of the cut, not directly behind it, so your eye is directly above the saw plate on the line. Your dominant eye, not your nose, goes over the blade.
- Let your elbow and shoulder move in a straight line parallel to the cut. If your elbow swings outward, the saw drifts with it.
- Apply pressure only on the cutting stroke (forward for push saws, back for pull saws). Return the blade with almost no pressure to reduce binding and wear.
- Use the full length of the blade. Short choppy strokes in the middle of the plate wear out a small section of teeth and are much slower.
- Keep the saw plate as close to vertical as possible. A slight tilt left or right tracks the cut off square through the thickness of the board.
- Let the saw do the work. If you are pressing hard, the saw is probably dull or you have the wrong saw for the material.
Staying Square: The Reflection Trick
A polished saw plate acts like a rough mirror. When you hold the saw against the face of your marked line and look at the reflection of the board in the plate, the reflection and the real board should form a continuous, unbroken line. If the reflection shows a kink, the plate is tilted. Adjust until the lines merge, then begin your stroke.
This works well for checking squareness across the face of the cut. For checking that the cut is square down through the thickness, a try square held against the side of the blade tells you everything you need to know. Check it after the first few strokes, before the kerf is too deep to correct.
If the cut starts to drift, do not try to steer it back by twisting the saw. That binds the plate and can kink a thin blade. Instead, back the saw out to where the kerf is still shallow enough to influence, then restart with the saw properly aligned. Twisting the handle to force a correction makes things worse almost every time.
When the Saw Binds
Binding in the middle of a cut usually means one of three things: the wood is green or wet and swelling around the kerf; the saw is dull and dragging rather than cutting; or you have drifted off square and the plate is wedged against one wall of the kerf.
A dry wooden wedge tapped lightly into the kerf behind the saw relieves the pinching from wet wood or a drifting cut. Paste wax rubbed on the saw plate reduces friction dramatically. Neither of these substitutes for a sharp saw, but they can help you finish a cut that has already started.
A sharp hand saw should cut without much effort at all. If you are muscling it, stop. Forcing a dull saw through wood is how kerf walls get torn and how cuts drift. Sharpening a handsaw is its own skill, but recognizing when a saw needs sharpening is just as important as technique.
Connecting Hand Saw Work to Other Hand Tool Skills
The discipline of following a knife line with a saw carries over directly to working with bench chisels. In both cases, you are working to a scribed line, cutting to the waste side, and using the tool's geometry rather than brute force. The muscle memory for light pressure and controlled movement built at the saw transfers to the chisel almost immediately.
A saw cut that leaves the surface rough or slightly off the line does not necessarily mean starting over. A sharp hand plane can bring a sawn surface to finished dimension with two or three passes, and using a hand plane without tearout is worth learning as a companion skill to hand sawing. Saw, plane, and chisel together cover nearly every dimensioning and joinery task in hand-tool woodworking.
Frequently Asked Questions
How do I keep my hand saw from drifting off the line?
Drift almost always comes from the elbow swinging out rather than tracking straight, or from the eye not being directly over the saw plate. Slow down, stand slightly to the side so your dominant eye sits above the blade, and use your extended index finger as a sight line. If the saw is already drifting in a deep kerf, back it out and restart; you cannot steer a saw sideways in a deep cut without binding the plate.
Should I use a push saw or a pull saw?
Both work well. Western push saws (which cut on the push stroke) are what most North American and European woodworkers grew up with and are easy to find in hardware stores. Japanese pull saws cut on the pull stroke, which keeps the thin plate in tension, allowing a thinner kerf and potentially finer cuts. For a beginner, the more important factor is sharpness: a sharp pull saw or a sharp push saw both outperform a dull version of either.
What TPI should I buy for general shop use?
A 10-12 TPI crosscut saw handles the majority of general woodworking crosscuts well. If you do any joinery, a 14-16 TPI backsaw is worth adding. A rip saw in the 5-7 TPI range is useful if you regularly rip boards to width by hand, though many beginners skip it until they have more experience.
Why does my saw leave a rough, fuzzy edge?
A ragged edge on a crosscut typically means one of two things: the saw is dull, or you are using a rip saw for a crosscut. Rip teeth tear across the grain fibers instead of slicing them. Try a fresh crosscut saw of the correct TPI and the difference will be immediately obvious. Tearout on the exit face (the bottom of the board) can be reduced by scoring the line deeply with a marking knife before sawing.
Do I need to clamp the workpiece?
Yes, almost always. A board that shifts or vibrates under the saw wastes energy, makes the cut less accurate, and is simply more tiring. Clamp the work to the bench, use a bench hook for crosscuts, or hold the piece in a vise. Your non-dominant hand should be guiding the saw at the start of the cut, not holding the board still.